Defold Action RPG - Porting the popular Godot tutorial series part 5

- 1Defold Action RPG - Porting the popular Godot tutorial series part 1Part 1 of 5
- 2Defold Action RPG - Porting the popular Godot tutorial series part 2Part 2 of 5
- 3Defold Action RPG - Porting the popular Godot tutorial series part 3Part 3 of 5
- 4Defold Action RPG - Porting the popular Godot tutorial series part 4Part 4 of 5
- 5Defold Action RPG - Porting the popular Godot tutorial series part 5Part 5 of 5
Welcome to the 5th and last part of this series where I am porting a Godot tutorial to Defold!
Video 17 - Player Stats and enemy attacks
Link to Heartbeasts video of part 17
Heartbeast makes use here of a singleton for the player stats which I personally am not fond of so I will continue doing this with components!
So first we add the health component to our player with 4 max health:

with this we also need an “on_message” function on the player controller:
---@param self PlayerController
---@param message_id userdata
---@param message table
---@param sender userdata
function on_message(self, message_id, message, sender)
if message_id == hash("on_death") then
go.delete()
end
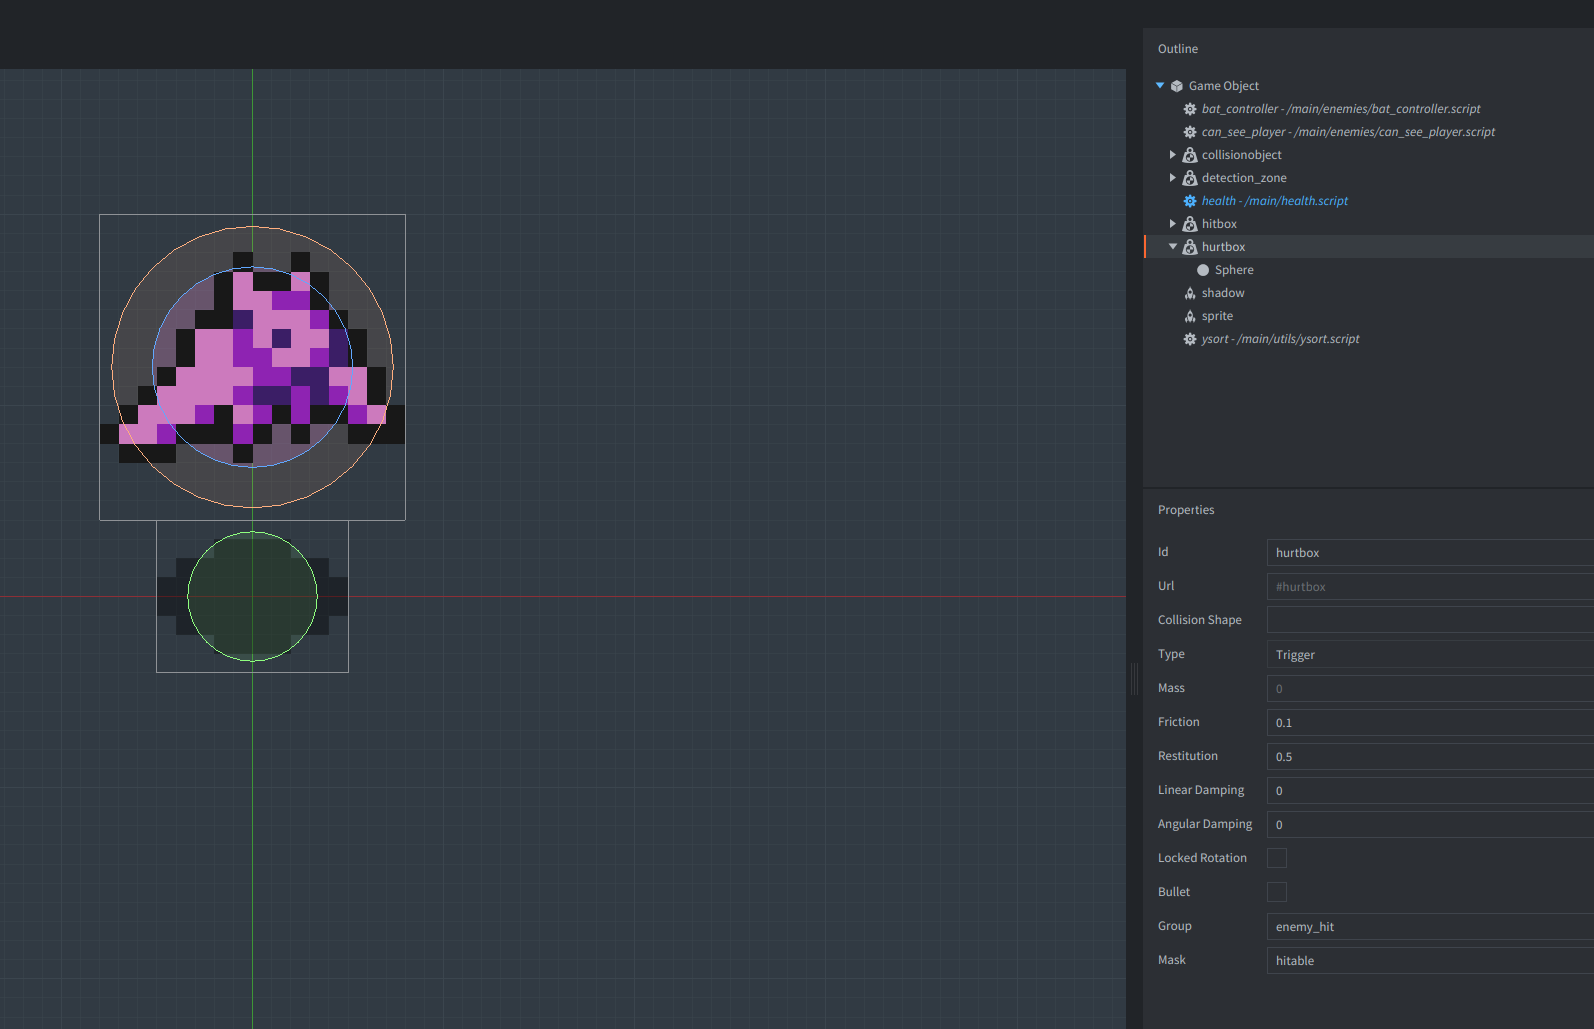
endnext we add a hurtbox to the bat:
and lastly we handle the collision of said hurtbox with the player:
    if is_hurtbox and message_id == hash("collision_response") then
        msg.post(message.other_id, "take_damage")
    end
the only issue now is that the player basically instantly dies but we can easily fix this by increasing our iframe which Heartbeast also implements in this video (but we did this earlier to solve an issue I had :D)
So lets increase it to 60 frames:
And with that we conclude part 17!
Video 18 - Player Hearts UI
Link to Heartbeasts video of part 18
First we will also try to render a simple text for our current health value so first we send a message from the health component to the object via:
function on_message(self, message_id, message, sender)
			  -- ...
        msg.post(".", "updated_health", { value = self.health })
    end
end
which we then send to the UI from inside the player controller:
function on_message(self, message_id, message, sender)
    if message_id == hash("on_death") then
        go.delete()
    end

		-- here!
    if message_id == hash("updated_health") then
        msg.post("/gui", "update_health", { value = message.value })
    end
end
Everything wired up time to create the health UI:
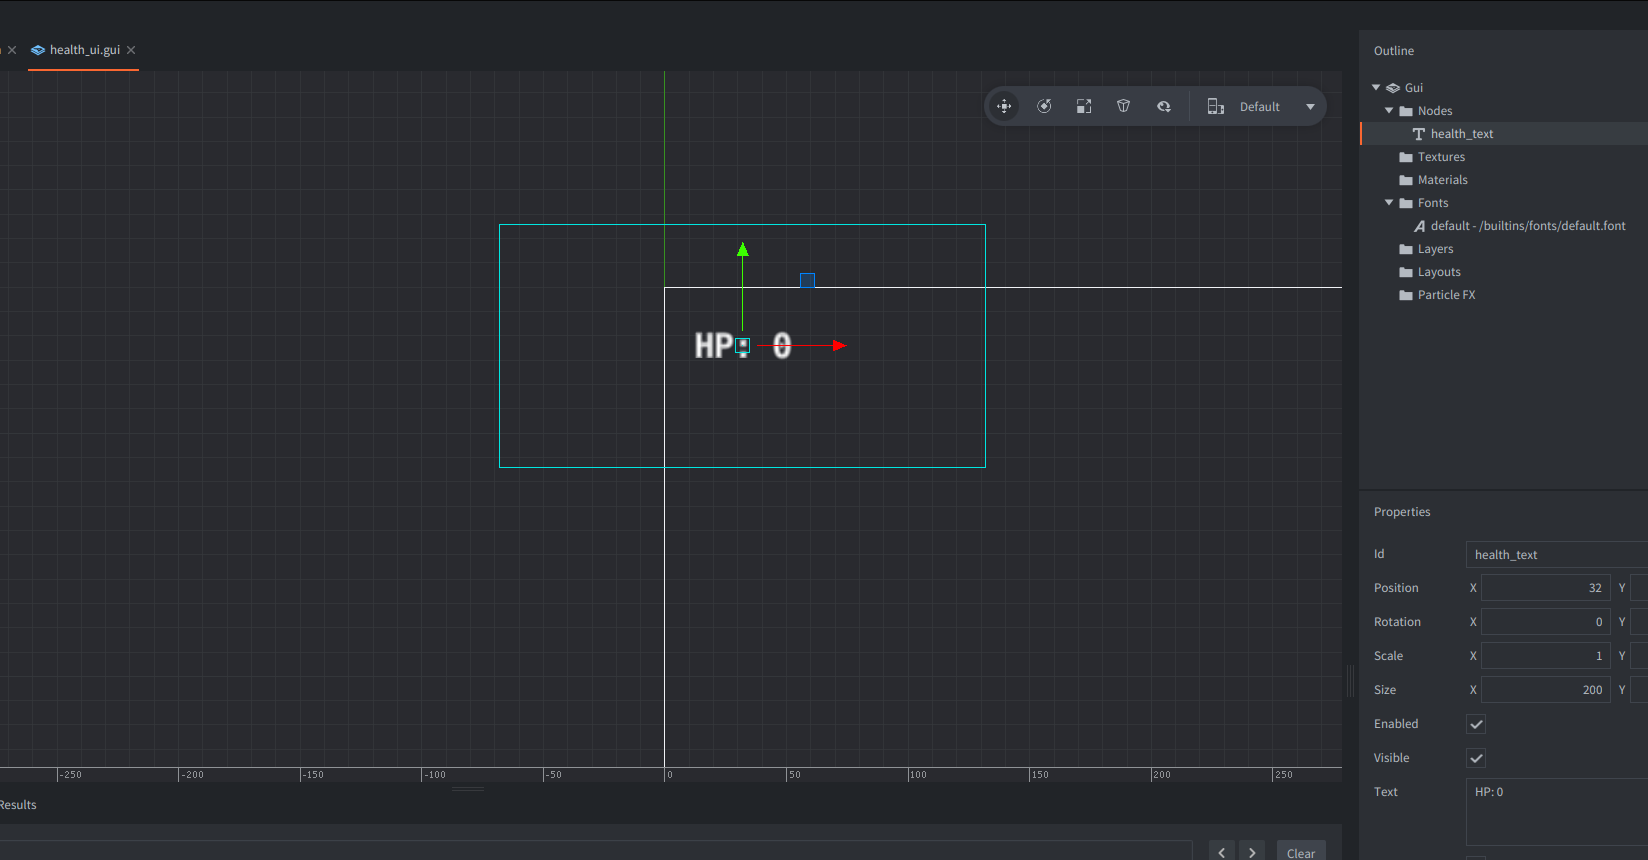
and next a health ui gui script with the following content:
function on_message(self, message_id, message, sender)
    if message_id == hash("update_health") then
        local node = gui.get_node("health_text")
        gui.set_text(node, string.format("HP: %s", message.value))
    end
end
When we receive an “update_health” message we just update the text, can’t get any simpler!
And lastly we also set an initial value otherwise the thing will stay at 0:
Inside the health component we just send an updated health message in init once:
---@param self Health
function init(self)
    self.health = self.max_health
    self.iframe = 0

    msg.post(".", "updated_health", { value = self.health })
end
and now the UI updates as expected :)!
Next Heartbeasts is using a textured rectangle for the hearts inside Godot which we obviously do not have here so we have to solve this problem completely different. This could probably be much better solved with a shader but since I wanted to keep this simple I just added 4 hearts and will toggle them full/empty via code:
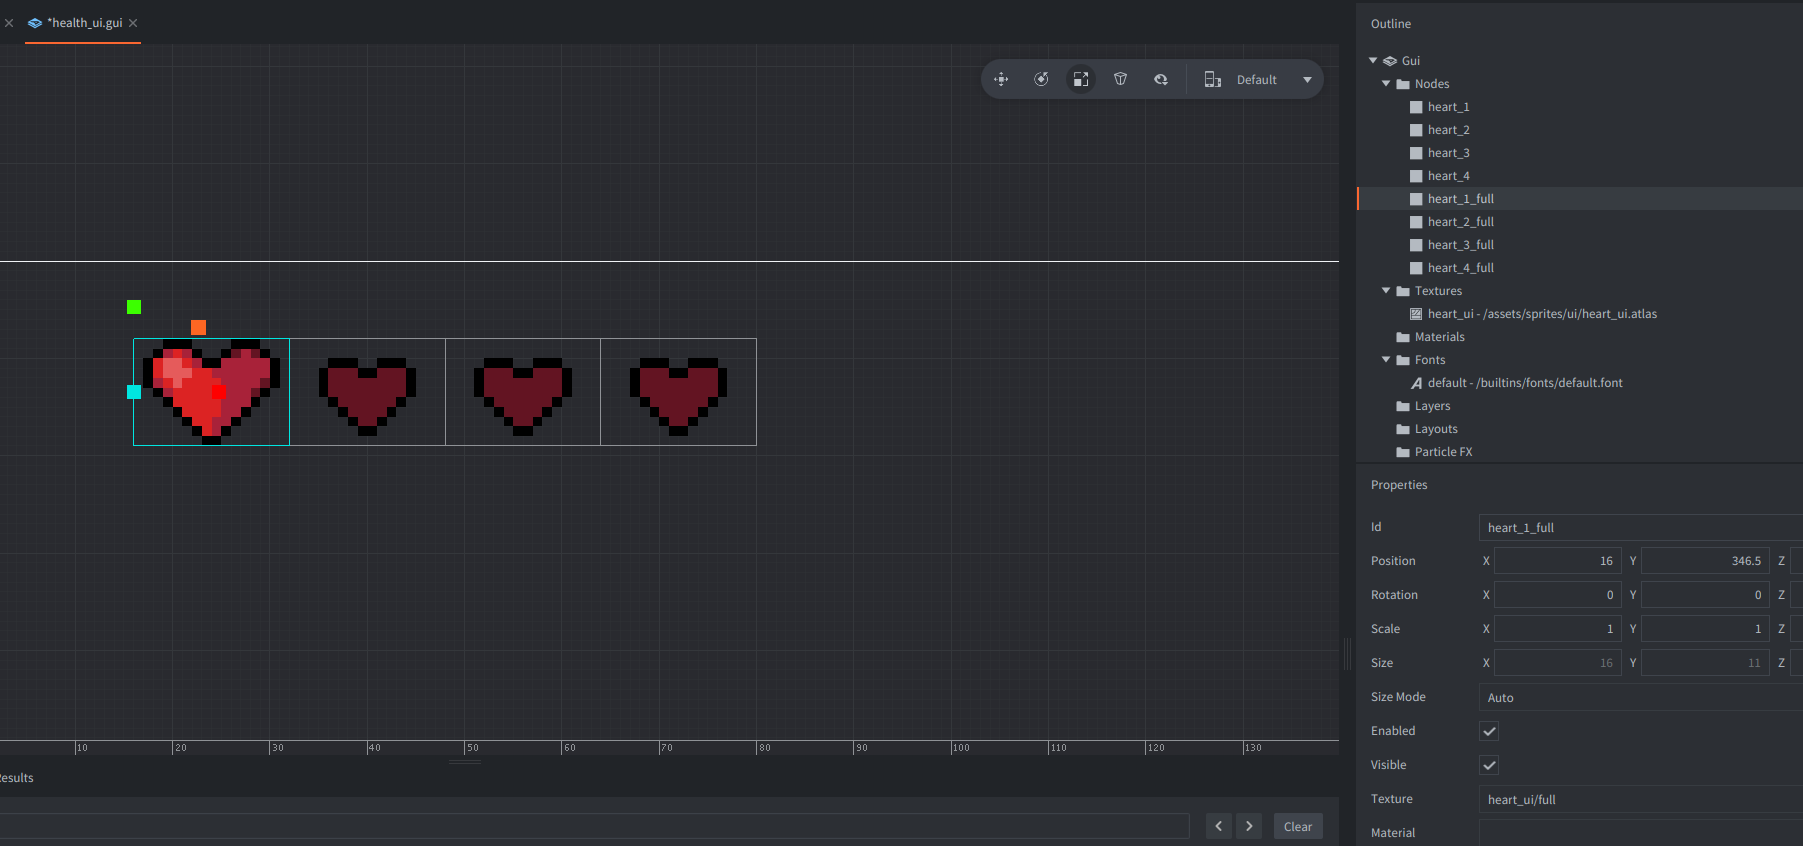
Next we just need the code:
local NUM_HEARTS = 4
---@param self any
---@param message_id userdata
---@param message table
---@param sender userdata
function on_message(self, message_id, message, sender)
if message_id == hash("update_health") then
set_hearts(self, message.value)
end
end
---@param self any
---@param value integer
function set_hearts(self, value)
for i = 1, NUM_HEARTS do
local is_heart_full = false
if i <= value then
is_heart_full = true
end
local heart_node = gui.get_node(string.format("heart_%s_full", i))
gui.set_visible(heart_node, is_heart_full)
end
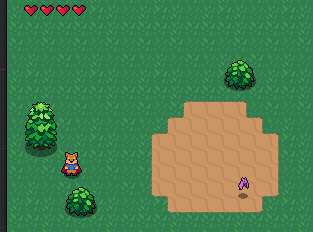
endand now we have a proper health UI! If you want to have more max hearts all you gotta do is create more boxes, a bit cumbersome but realistically good enough :).
For some reason the last bit of this part was a tree so lets make one:
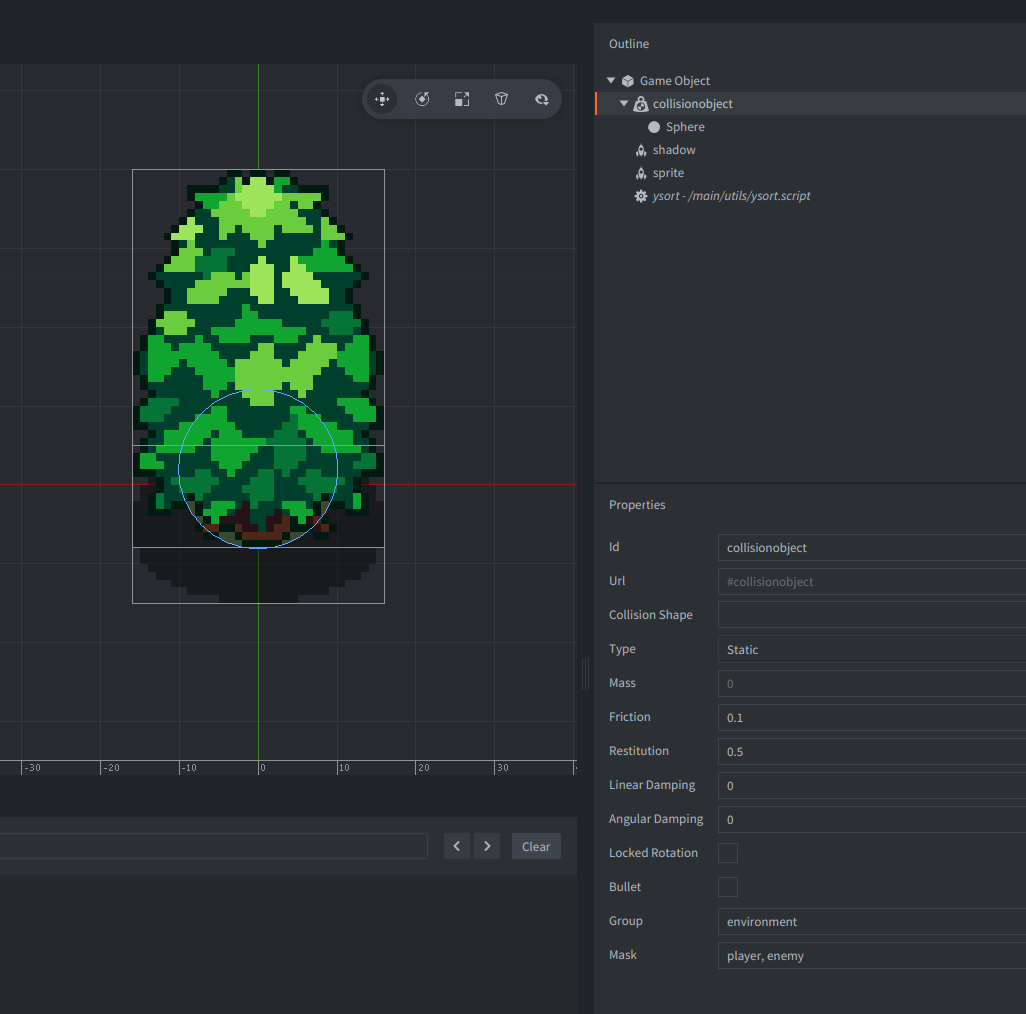
and some shadows to everything and we are done with this part! :)
Video 19 - Enemy Soft Collisions
Link to Heartbeasts video of part 19
First we implement the required math function from Godot which is very simple this time:
-- inside xvmath.lua...

---@param vec vector3
---@param vec_to vector3
---@return vector3
function M.direction_to(vec, vec_to)
    local new_vec = vmath.normalize(vec_to - vec)
    ---@cast new_vec vector3
    return new_vec
end
then we setup a new collision shape on our bat:
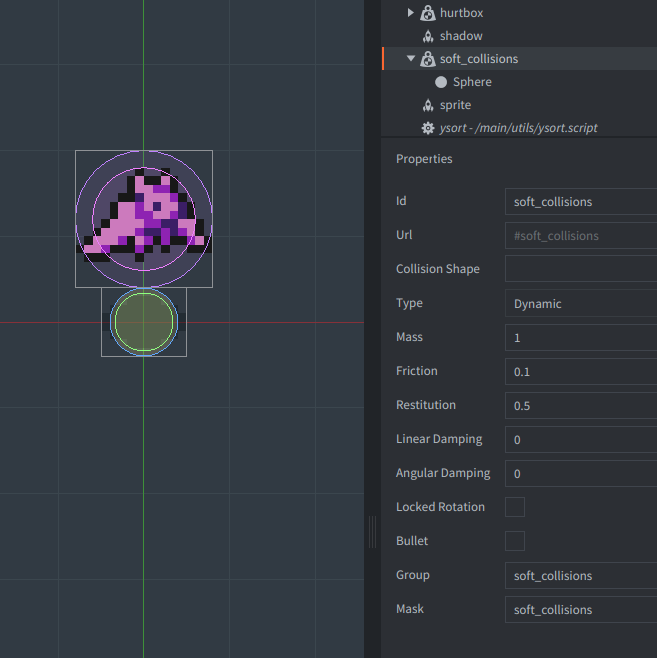
Important part here that the group and mask are both “soft_collisions” and then instead of adding a new component since this is fairly trivial we just integrate this into our bat controller:
--- somewhere in the on_message from the bat controller
if message_id == hash("collision_response") and message.own_group == hash("soft_collisions") then
		local pos = go.get_position()
		local direction = xvmath.direction_to(message.other_position, pos)
		self.velocity = self.velocity + direction * 10
end
what we did different here, we just added a small nudge to the current velocity when the bat collides with another bat (or something else having said collision group) and that keeps them nicely from overlapping with each other
and that concludes this part :)
Video 20 - Player Camera
Link to Heartbeasts video of part 20
First we set up a new game object for our camera which contains a camera component and a camera controller script
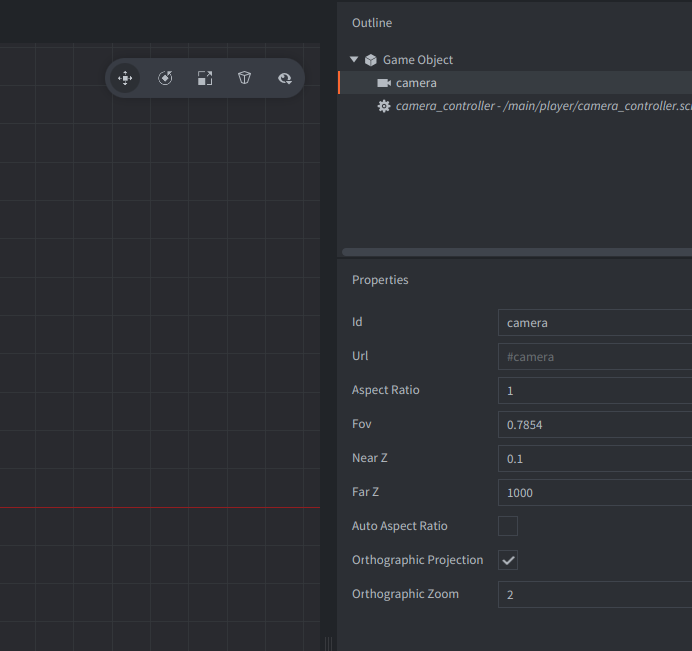
Since this is pixel art I also set the zoom to x2 and made the camera use an orthographic projection.
Next in our script:
---@class CameraController
---@field follow_go url

go.property("follow_go", msg.url())
we define a property which lets us follow a game object since the camera is not associated with the player which will give us more flexibility on what to do with it.
---@param self CameraController
function init(self)
    msg.post("@render:", "use_camera_projection")
    msg.post("#camera", "acquire_camera_focus")
end
then we tell turn the camera active and lastly
---@param self CameraController
---@param dt float
function update(self, dt)
    local pos = go.get_position()
    local go_pos = go.get_position(self.follow_go)

    -- keep our own Z position
    go_pos.z = pos.z
    go.set_position(go_pos)
end
we get our position, the followed game object position and use that objects position as our own except for the Z coordinate because we want to have some distance here.
Next we add the camera object to our main.collection, set the Z position to -1 so again there is some distance to the rest of the world and then tell the script to follow the player:
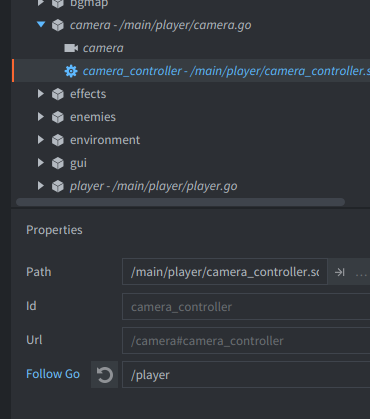
and with that we have a nice camera following our player:
Video 21 - Bat Wander State
Link to Heartbeasts video of part 21
Since we use message passing instead of calling objects directly it felt like integrating the “wander controller” directly into our bat controller was more natural, so we first do that:
local WANDER_RANGE = 32

-- ...

---@class BatController
---@field velocity vector3
---@field state integer
---@field start_position vector3
---@field target_position vector3
---@field wander_timer userdata|nil

---@param self BatController
function init(self)
    -- ...
    self.start_position = go.get_position()
    self.target_position = self.start_position
    self.wander_timer = create_wander_timer(self, 1.0)
end

-- ...

---@param self BatController
---@param duration float
---@return userdata
function create_wander_timer(self, duration)
    return timer.delay(duration, false, function()
        self.target_position = self.start_position + vmath.vector3(
            math.random(-WANDER_RANGE, WANDER_RANGE),
            math.random(-WANDER_RANGE, WANDER_RANGE),
            self.start_position.z
        )
    end)
end
we define some constants and in init set the start position and create a timer that randomly updates the target position to something new within the given the wander range.
For the next part we add a new utility function to our modules directory:
local M = {}

--- Picks and removes a random element from an array
---@param array table
---@return any?
function M.pick_random(array)
    if #array == 0 then
        return nil
    end

    local index = math.random(1, #array)
    local elem = table.remove(array, index)

    return elem
end

return M
which implements a function that removes a random element from a table.
Now that we have that lets change the init function slightly
function init(self)
    self.velocity = xvmath.zero()
    self.start_position = go.get_position()
    self.target_position = self.start_position

    self.state = rng.pick_random({ STATE_IDLE, STATE_WANDER })
    self.wander_timer = create_wander_timer(self, math.random(1.0, 3.0))
end
so that we are picking a random state and then create a new wander timer which sets a new target position.
next we update idle state to match this:
---@param self BatController
---@param dt float
function idle_state(self, dt)
    self.velocity = xvmath.move_toward(self.velocity, xvmath.zero(), FRICTION * dt)

    if not timer.get_info(self.wander_timer) then
        self.state = rng.pick_random({ STATE_IDLE, STATE_WANDER })
        self.wander_timer = create_wander_timer(self, math.random(1.0, 3.0))
    end
end
we check if the timer is still running (timer.get_info() returns nil when the timer isn’t) and if it isn’t we just rerun the code from before again aka pick another random state and create a new target position
and lastly we also update the wander state:
---@param self BatController
---@param dt float
function wander_state(self, dt)
    if not timer.get_info(self.wander_timer) then
        self.state = rng.pick_random({ STATE_IDLE, STATE_WANDER })
        self.wander_timer = create_wander_timer(self, math.random(1.0, 3.0))
    end

    local direction = vmath.normalize(self.target_position - go.get_position())
    ---@cast direction vector3
    self.velocity = xvmath.move_toward(self.velocity, direction * MAX_SPEED, ACCELERATION * dt)

    if xvmath.distance(go.get_position(), self.target_position) <= WANDER_TARGET_RANGE then
        self.state = rng.pick_random({ STATE_IDLE, STATE_WANDER })
        self.wander_timer = create_wander_timer(self, math.random(1.0, 3.0))
    end
end
which firstly does the same thing as before, set the velocity to our target position and lastly pick another new position (or idle) should we get close to the target position to not wobble around the prior one.
Since we have this code snippet now 4 times we might as well make a function out of this:
---@param self BatController
function update_wander(self)
    self.state = rng.pick_random({ STATE_IDLE, STATE_WANDER })
    self.wander_timer = create_wander_timer(self, math.random(1.0, 3.0))
end
also as a nice bonus, we update the fixed_update function to look like this:
---@param self BatController
---@param dt float
function fixed_update(self, dt)
    if self.state == STATE_IDLE then
        idle_state(self, dt)
    elseif self.state == STATE_CHASE then
        chase_state(self, dt)
    elseif self.state == STATE_WANDER then
        wander_state(self, dt)
    end

    self.velocity = xvmath.move_toward(self.velocity, xvmath.zero(), FRICTION * dt)

    -- make the bat face the direction it moved to
    if vmath.length(self.velocity) > 0 then
        sprite.set_hflip("#sprite", self.velocity.x < 0)
    end

    move(self.velocity * dt)
end
which makes the bat sprite always look into the direction it is moving! There we go, we now have wandering bats!
(Two of them couldn’t stop themselves from hugging each other I guess)
Video 22 - Sounds + Hit Flash Effect
Link to Heartbeasts video of part 22
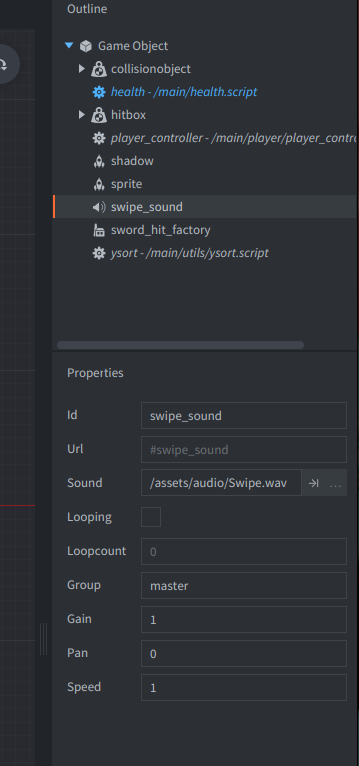
First we want to add the swipe sound, for that we need to add a sound component to our player
and then in attack state:
function attack_state(self, dt)
		-- ...

    sound.play("#swipe_sound")
    self.anim_tree:play("attack")

		-- ...
end
next we do the same for the enemy death effect
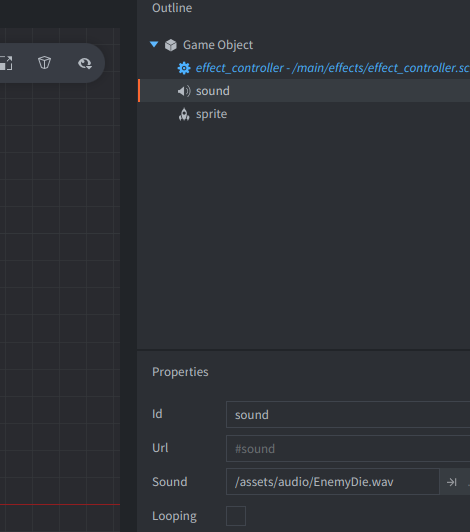
here we modify the script a bit more so that we can have effects with sound:
---@class EffectController
---@field has_sound boolean

go.property("has_sound", false)

---@param self EffectController
function init(self)
    if self.has_sound then
        sound.play("#sound")
    end

    sprite.play_flipbook("#sprite", hash("anim"), function(_self, message_id, _message, _sender)
        if message_id ~= hash("animation_done") then
            return
        end

        go.delete()
    end)
end
same with the hit effect.
Next we add another sound component to the player to do the evade sound (also renamed swipe_sound to sound_swipe so that they are grouped)

and again in code:
function roll_state(self, dt)
		-- ...

    sound.play("#sound_evade")

    self.anim_tree:play("roll")

		-- ...
end
and that concludes our sound effects!
Lastly we need to tackle the hit effect which we will implement using sprite tint instead of the shader that Heartbeast was using:
First in our generic health component we add two new functions:
function start_iframe_animation()
    go.animate("#sprite", "tint.w", go.PLAYBACK_ONCE_FORWARD, 2, go.EASING_LINEAR, 0.1)
end

function stop_iframe_animation()
    go.animate("#sprite", "tint.w", go.PLAYBACK_ONCE_FORWARD, 1, go.EASING_LINEAR, 0.1)
end
this allows us to modify the alpha value of the sprites tint which looks a bit different from what Heartbeast is doing but for simplicities sake this is good enough, we ramp it up to 2 which creates a glow like this:
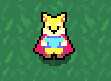
and then when the iframe is over we just go back to the normal tint.
Next we gotta add these functions to the appropriate locations, first we modify the on_message function:
function on_message(self, message_id, message, sender)
    local iframe_active = self.iframe > 0

    if not iframe_active and message_id == hash("take_damage") then
				-- ...

        msg.post(".", "updated_health", { value = self.health })
        start_iframe_animation()
    end

    if message_id == hash("start_iframe") then
        self.iframe = message.iframe_duration or self.iframe_duration
        start_iframe_animation()
    end
end
which starts the animation when the entity is hit or it got a “start iframe” message, which we will send from our roll state like this:
function roll_state(self, dt)
		-- ...

    sound.play("#sound_evade")

    msg.post(".", "start_iframe")

    self.anim_tree:play("roll")

		-- ...
end
and lastly in update we need to end the iframe effect:
---@param self Health
---@param dt float
function update(self, dt)
    local iframe_active = self.iframe > 0

    if iframe_active then
        self.iframe = self.iframe - 1
    end

    if self.iframe <= 0 then
        stop_iframe_animation()
    end

    if self.health <= 0 then
        msg.post(".", "on_death")
    end
end
and with that we have a hit flash effect!
BONUS - Camera Limits
The last part which is also going to be very short since we are only adding camera bounds!
Lets first start by adding our map details to the camera controller:
go.property("tilemap_width", 32)
go.property("tilemap_height", 32)
go.property("tile_size", 16)
normally this should probably be extracted via:
local x, y, w, h = tilemap.get_bounds("/map#tilemap")but since we are not using the Defold tilemap in this project we have to manually enter these via the editor:
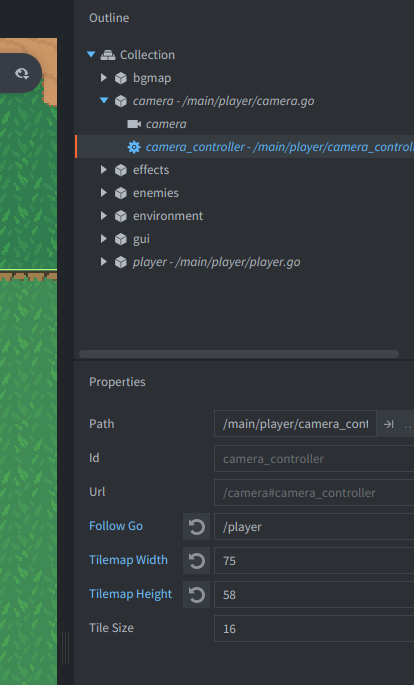
and with that we can calculate the bounds:
---@param self CameraController
function init(self)
    msg.post("@render:", "use_camera_projection")
    msg.post("#camera", "acquire_camera_focus")

    local level_pos = go.get_position("/bgmap")

    self.bounds = vmath.vector4(
        level_pos.x + self.tile_size,
        level_pos.y + self.tile_size,
        level_pos.x + (self.tilemap_width * self.tile_size),
        level_pos.y + (self.tilemap_height * self.tile_size)
    )

    local zoom = go.get("#camera", "orthographic_zoom")
    self.display_size = vmath.vector3(
        sys.get_config_number("display.width") / zoom,
        sys.get_config_number("display.height") / zoom,
        0
    )

    self.z = go.get_position().z
end
and add a limit function:
---@param self CameraController
---@param pos vector3
function limit(self, pos)
    local left = self.bounds.x + self.display_size.x / 2
    local right = self.bounds.z - self.display_size.x / 2
    local top = self.bounds.w - self.display_size.y / 2
    local bottom = self.bounds.y + self.display_size.y / 2
    pos.x = math.min(pos.x, right)
    pos.x = math.max(pos.x, left)
    pos.y = math.min(pos.y, top)
    pos.y = math.max(pos.y, bottom)
    return pos
end
which we lastly just apply to update:
---@param self CameraController
---@param dt float
function update(self, dt)
    local pos = go.get_position(self.follow_go)
    pos.z = self.z
    go.set_position(limit(self, pos))
end
and with that we conclude this small series about how I ported this Godot tutorial to Defold.
There are some bugs left that are not present in the original, but I was too lazy to hunt them down :)
Thanks for reading!